|
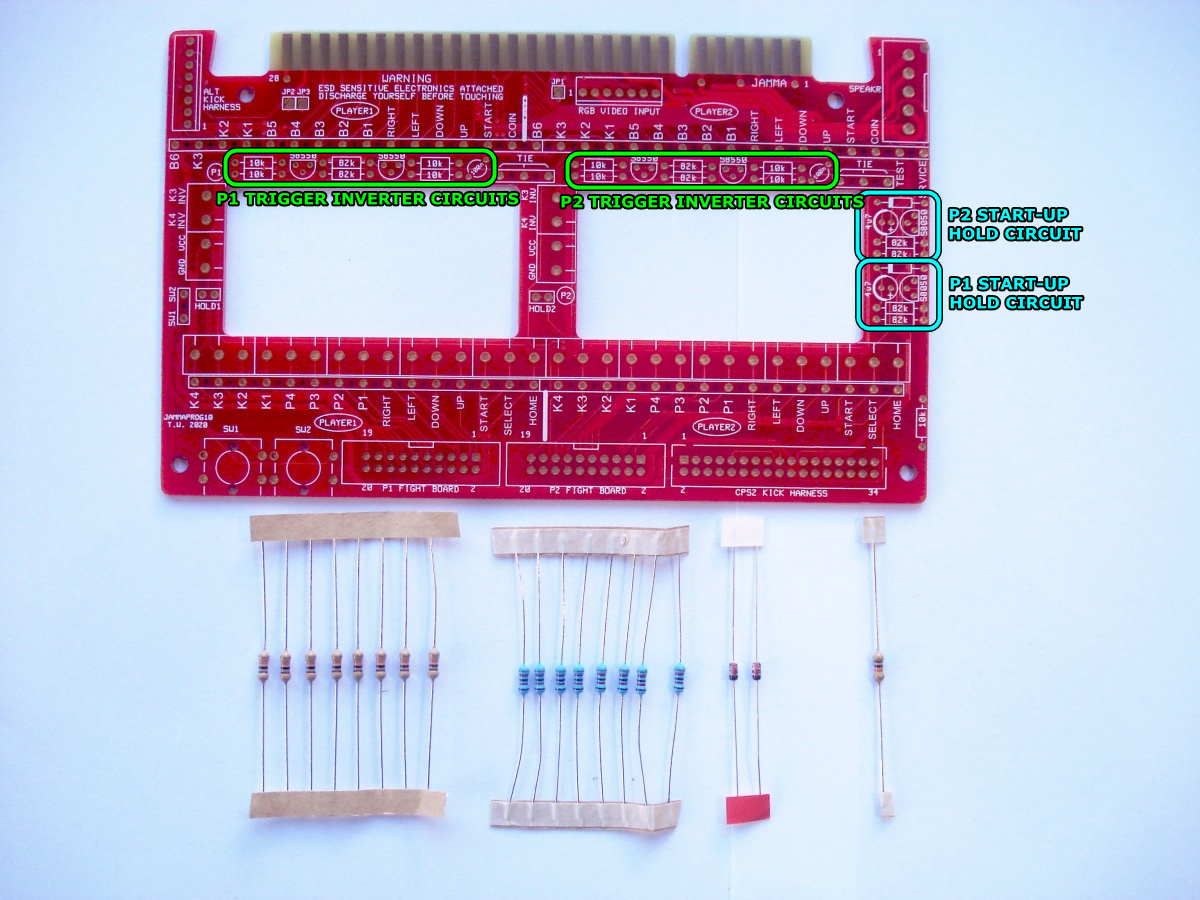
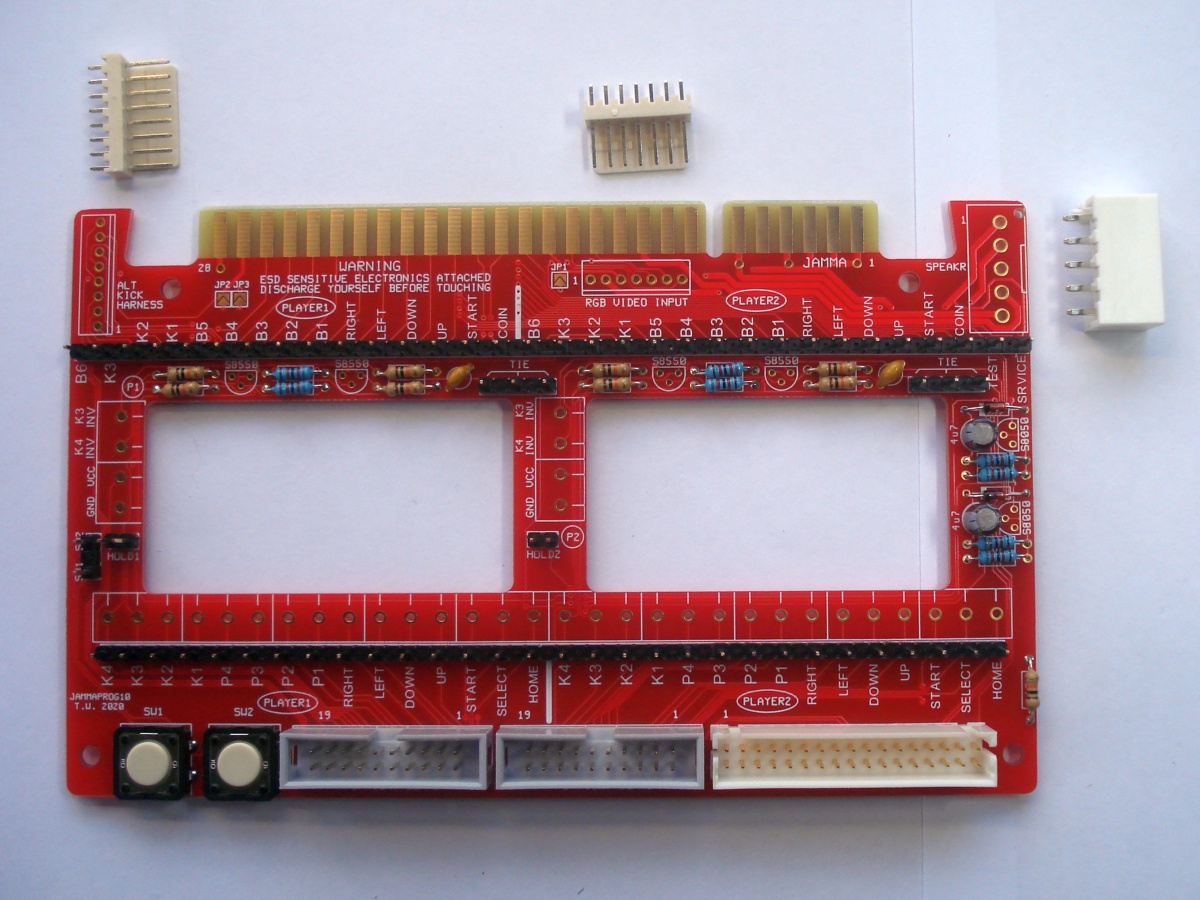
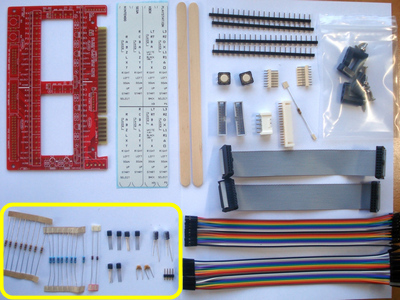
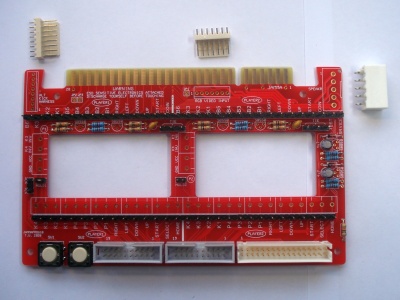
The kit contains the following parts.
- 1 of JAMMA-Prog board
- 2 of controller function list sticker
- 2 of wooden stick
- 4 of pin strip, 20 pin, 5.08mm pitch
- 2 of Omron B3F-4000 pushbutton switch
- 1 of KF2510 header, 7 pin, 2.54mm pitch
- 1 of KF2510 header, 8 pin, 2.54mm pitch
- 2 of IDC box header, 20 pin
- 1 of JST VH header, 5 pin, 3.96mm pitch
- 1 of Hirose DF1B header, 34 pin, 2.5mm pitch
- 1 of 10k resistor (brown body)
- 1 packet of feet, containing
- 4 of black plastic PCB foot, 20mm height
- 4 of fine thread screw
- 4 of wood screw
- 2 of IDC ribbon cable, 20 pin, 150mm length
- 20 of 1p-1p female jumper wire, 200mm length
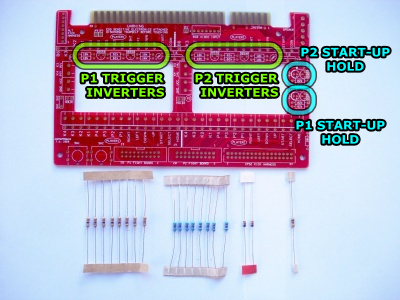
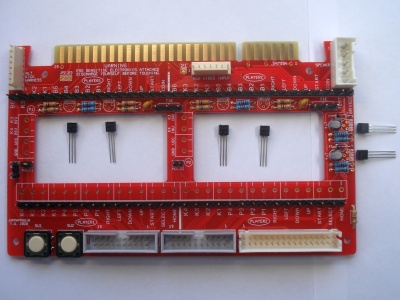
These parts, packaged separately, are for the trigger inverter and
start-up hold circuits.
- 8 of 10k resistor (brown body)
- 8 of 82k resistor (blue body)
- 2 of 1N4148 diode
- 4 of SS8550 PNP transistor
- 2 of SS8050 NPN transistor
- 2 of 100n MLC capacitor (orange body)
- 2 of 4.7u electrolytic capacitor
- 1 of pin strip, 4 pin, 2.54mm pitch
|
|
It's easiest to start with the components which have the lowest
height. Fit the resistors and diodes. The diodes are polarised
(installed a particular way around). Match black anode stripe on the
glass body with the stripe marked silkscreen legend.
The trigger inverter circuits are for game pad hacks to game pads
with analog triggers.
The start-up hold circuits are for fighter board controller boars
such as the Brook & PS360 boards which have different modes
which are set by holding a button down during start-up.
Fitting either the trigger inverter or start-up hold circuits is
optional. You would generally want one or the other or neither. I am
fitting both in this guide, to show where the components go, but
it's not useful to have both. |
|
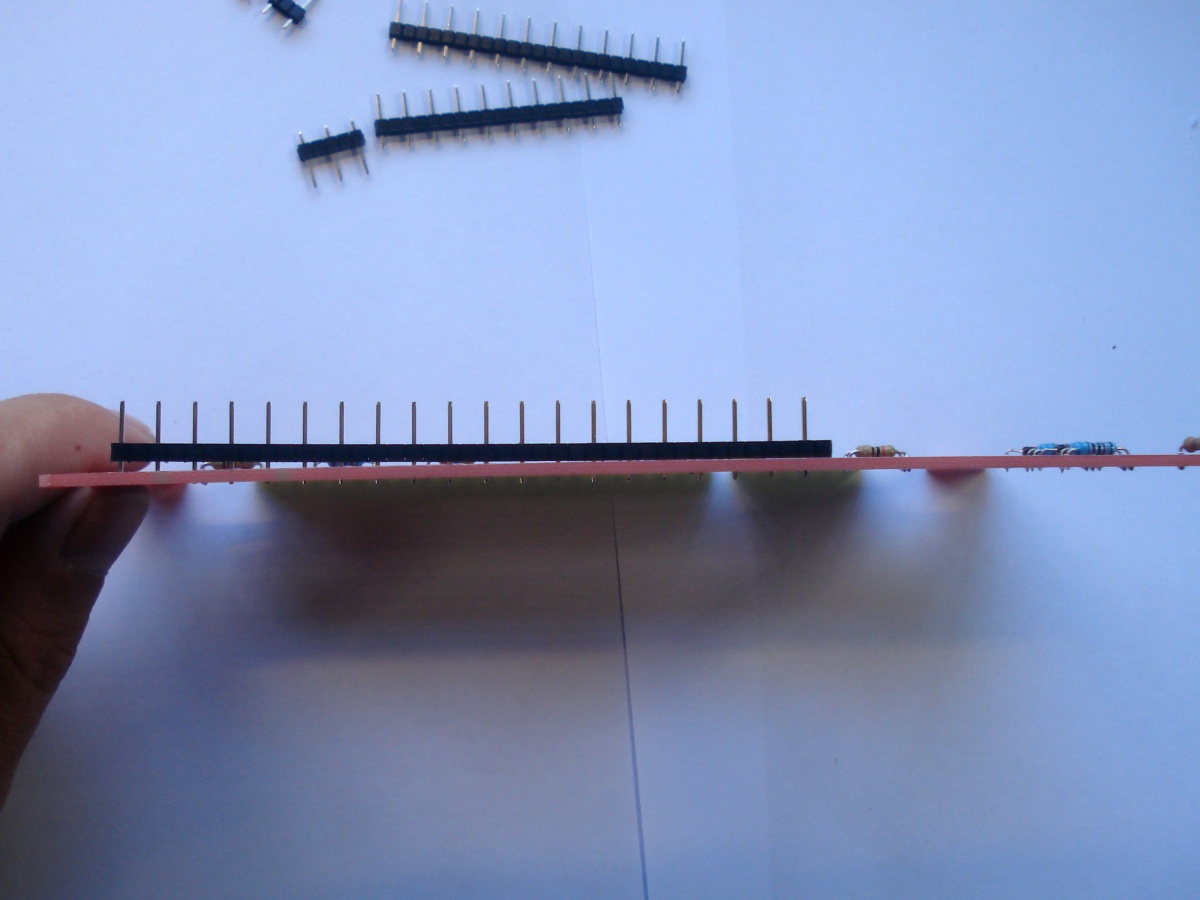
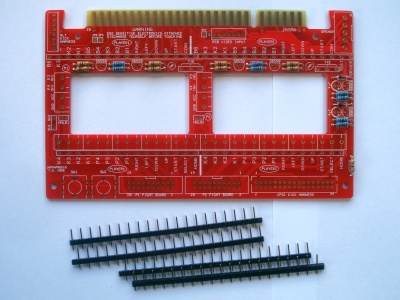
It's time to install the pin strips. There are 4 strips of 20 pins
each. Use two strips whole. Break one 12 pins long, the other 10
pins long. From the remainder break a couple of strips of 3 pins for
the tie points and one strip of 2 pins for the switches (SW1, SW2).
If you bought the extra parts, cut the 4 pin, 2.54mm pitch strip
into two pieces of 2 pins each. Then fit them into HOLD1 and HOLD2
positions. |

|
The long pin strips don't want to stay flush against the board
sometimes. The trick is to solder only the two pins on each strip,
one on each end. This make it easy to adjust when crooked. Once
everything is flush and aligned solder all the remaining pins. |
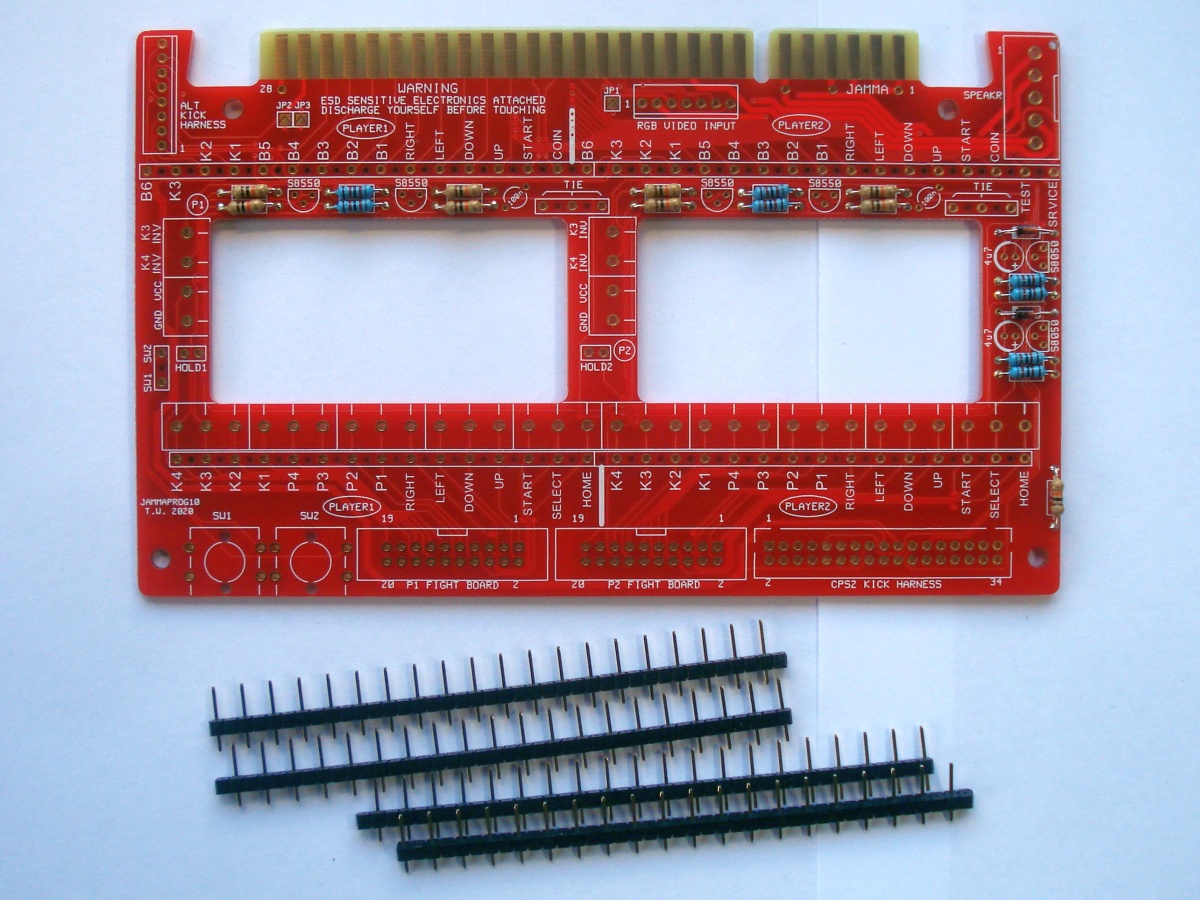
|
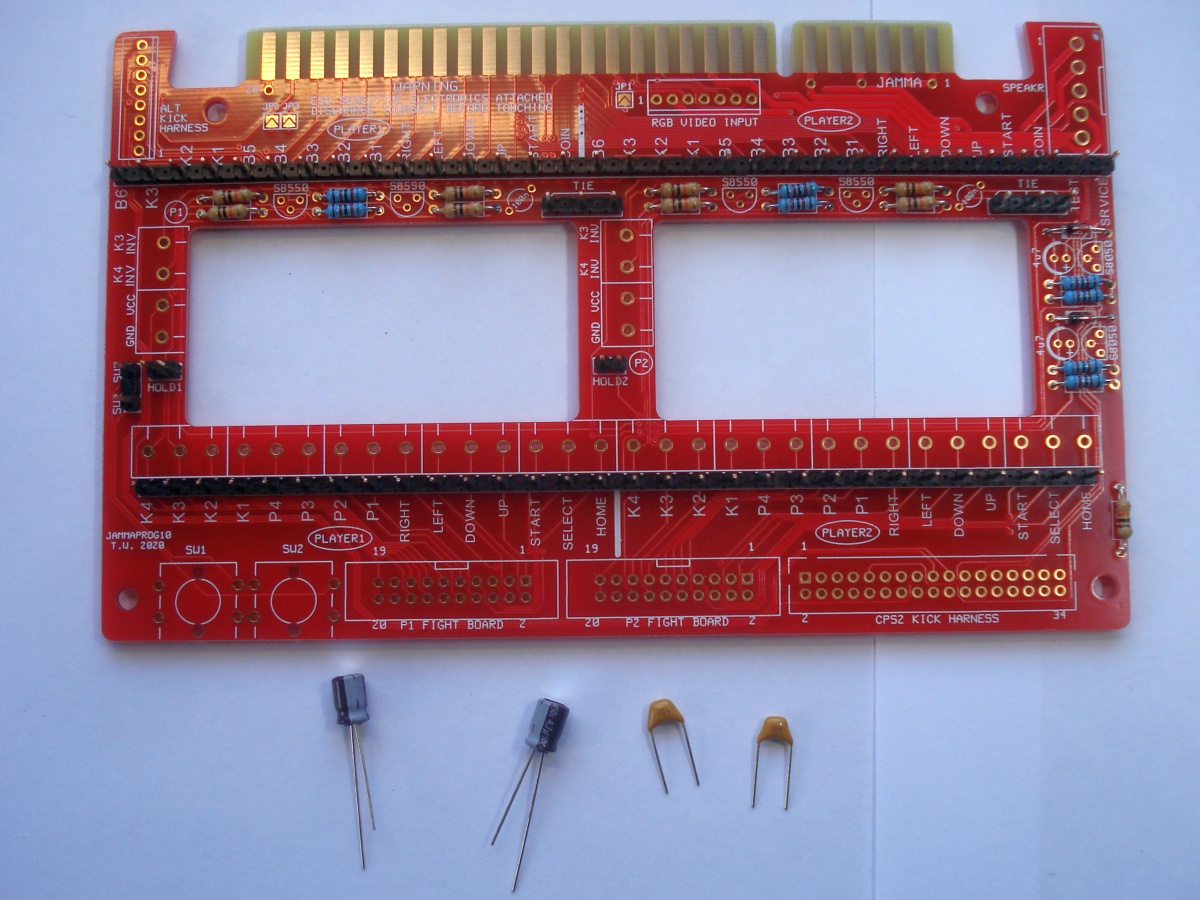
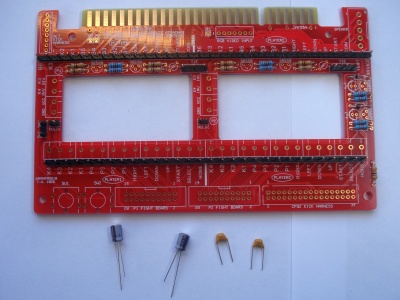
Fit the two 100n MLC capacitors and the two 4.7u electrolytic
capacitors. The electrolytic caps are polarised. Match the white
stripe of the capacitor with bold semicircle on the silkscreen
legend. |

|
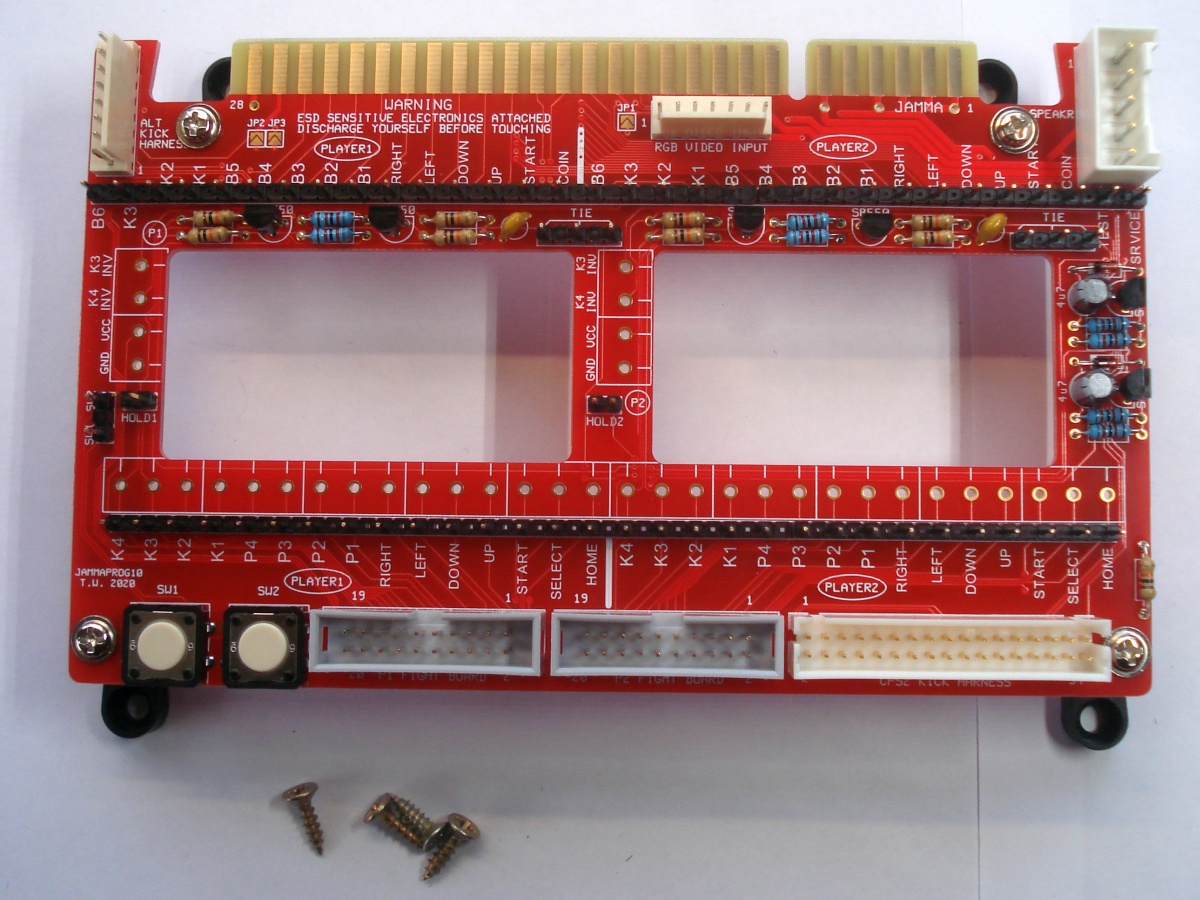
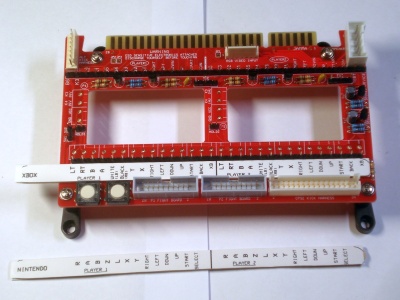
Fit the two Omron pushbutton switches, the two IDC box headers,
and the CPS2 kick header. Make sure you put the headers the right
way around. |
|
Fit the remaining headers. Make sure you put the headers the right
way around. |
|
Fit the transistors. The trigger inverter circuits have four SS8550 transistors while the start
up hold circuits have two SS8050
transistors. Like the diodes, these are polarised. Match the
transistor body shape with the silkscreen legend. |
|
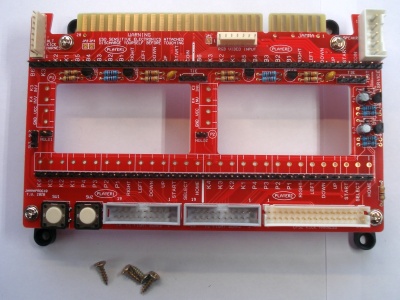
Screw on the PCB feet using the fine pitch screws. |
|
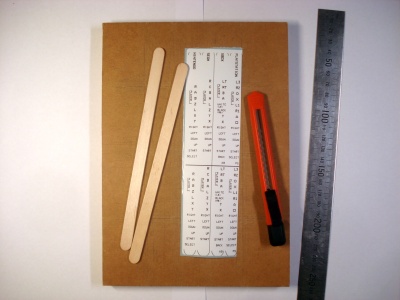
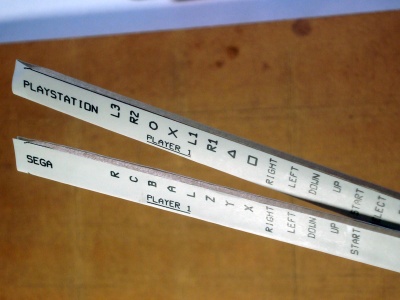
In order to support multiple consoles, the kit comes with four
different controller function labels and a pair of wooden sticks to
attach them to. This makes it easy to switch the labels when a
multi-console controller board is connected.
Xbox, Playstation, Sega, Nintendo labels are provided.
If you are wiring pad hacks it may be easiest to cut out the
particular label you need and stick straight to the JAMMA-Prog
board, under the controller side pins.
If want replaceable labels, read on...
|

|
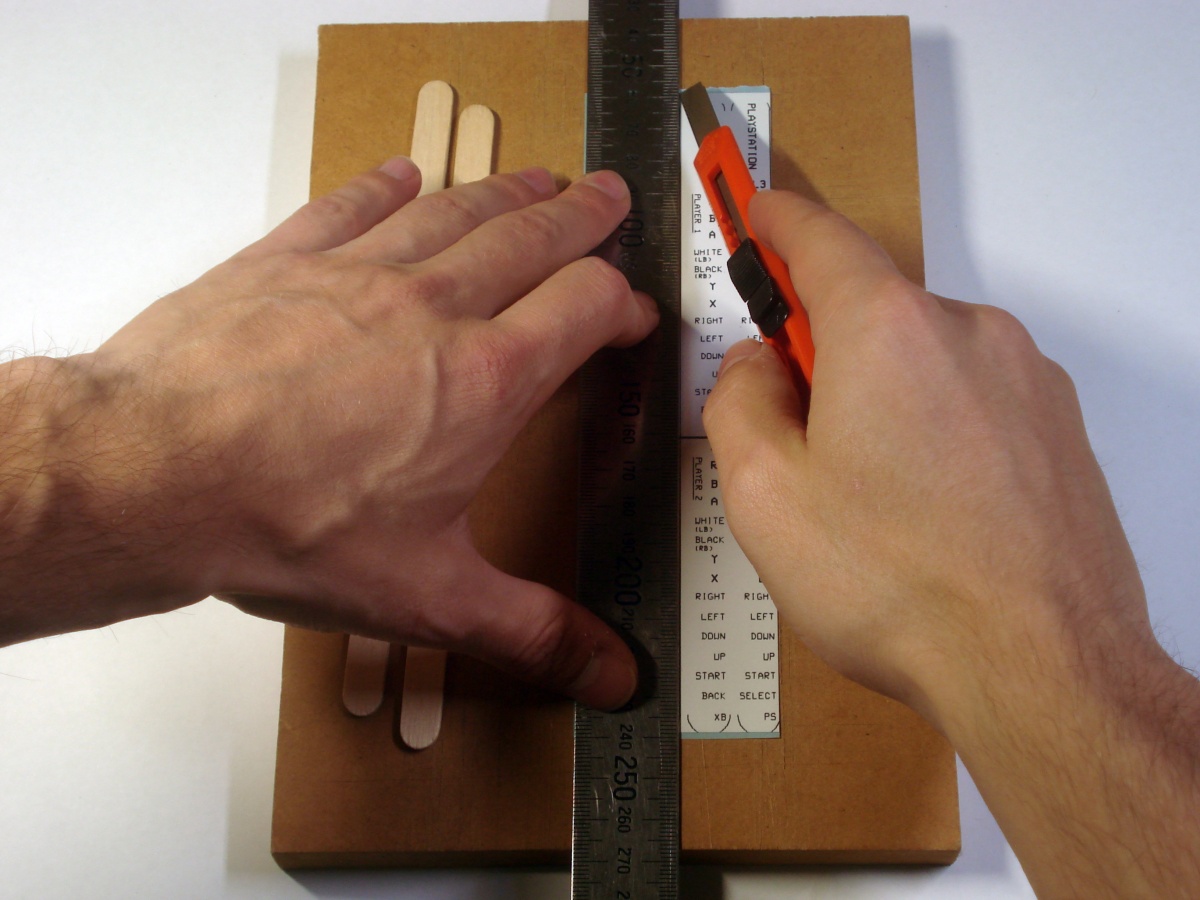
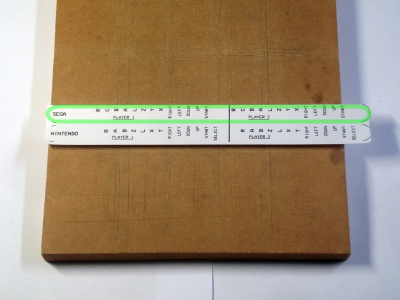
Place a metal ruler or other straight edge along the printed edge
of the Sega label and cut with a sharp knife.
|
|
Remove the label backing paper and stick the label over one of the
wooden sticks. The edge of the Sega label you just cut lines up with
the edge of the stick. The stick should lie between two semicircles
on each end.
|

|
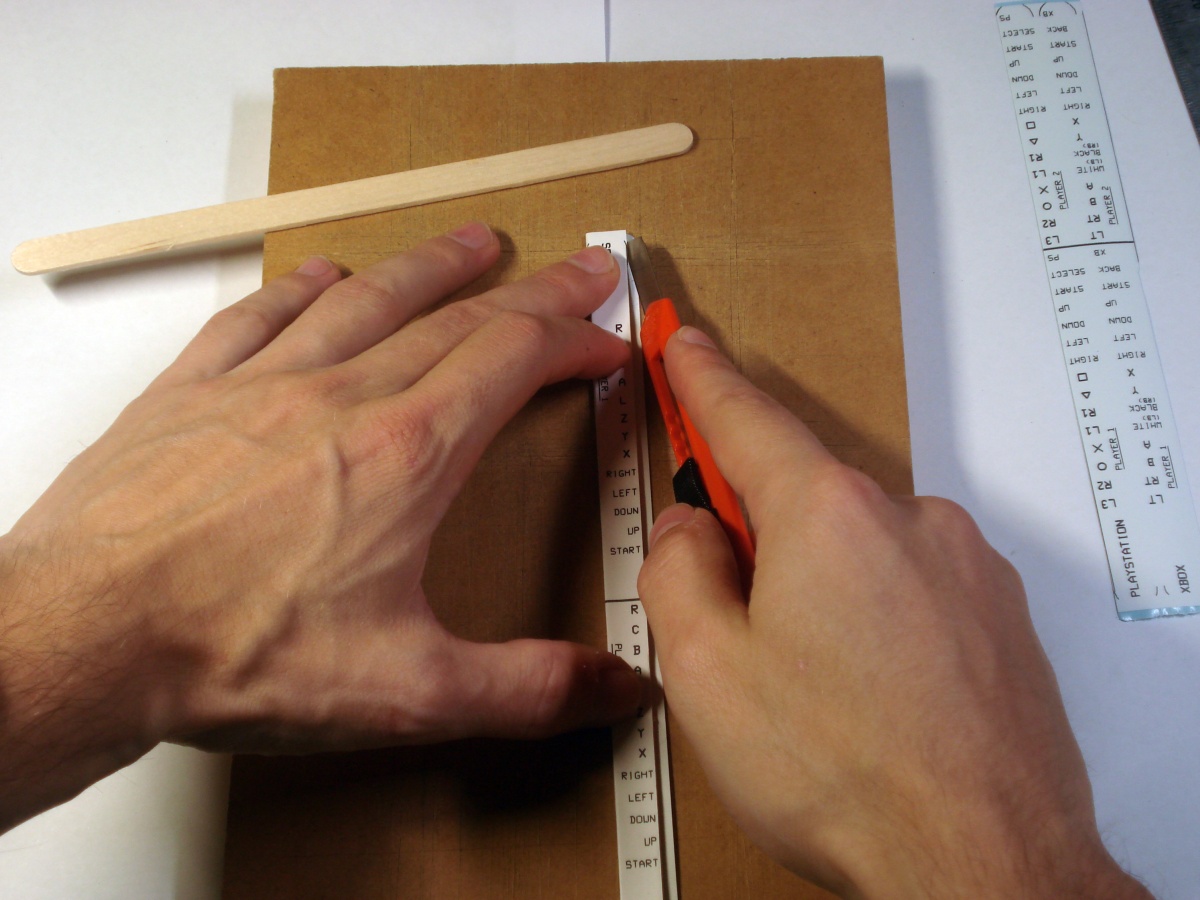
Fold the label over the stick and cut the excess label off with
the knife.
Now one side of the stick has a Sega label and the other an Nintendo
lable.
|
|
Do the same with the Xbox/Playstation label.
|
|
The label stick fits snugly between the controller pin strip and
connectors below.
Now the JAMMA-Prog board is ready to wire up a game pad hack or plug
in a multi-controller board.
|